This page was translated by an AI (LLM) with a cursory human check and is awaiting full review.
Access to JupyterHub
The IDRIS teams have set up JupyterHub, a solution that allows the use of Jupyter Notebooks and other applications such as MLflow or Dask via a web interface without prior SSH connection to the machine. A procedure has been established to connect to this tool and access the login nodes as well as the compute nodes via Slurm.
Access to JupyterHub
Access to the tool is available on the following website: https://jupyterhub.idris.fr. The connection methods are similar to those for accessing the Jean Zay login nodes:
- The same username and password are used to access the machine
- IP address filtering by the firewall is also in effect. You can add a new IP via the Account Management Form.
- Your organisation's firewall must allow HTTPS connections to
jupyterhub.idris.frandjean-zay.sso.idris.fr.
Connection Interface
Connection to JupyterHub is done via the IDRIS centralised authentication service. The username and password are those you use to connect to the Jean Zay machine.
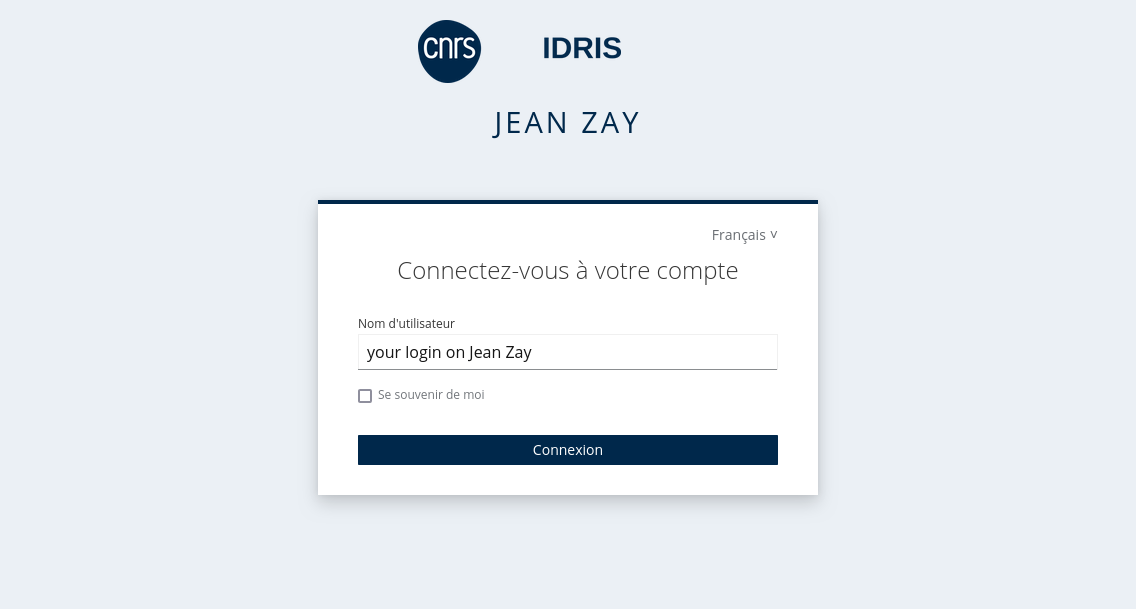
When you connect, the following page will be displayed:

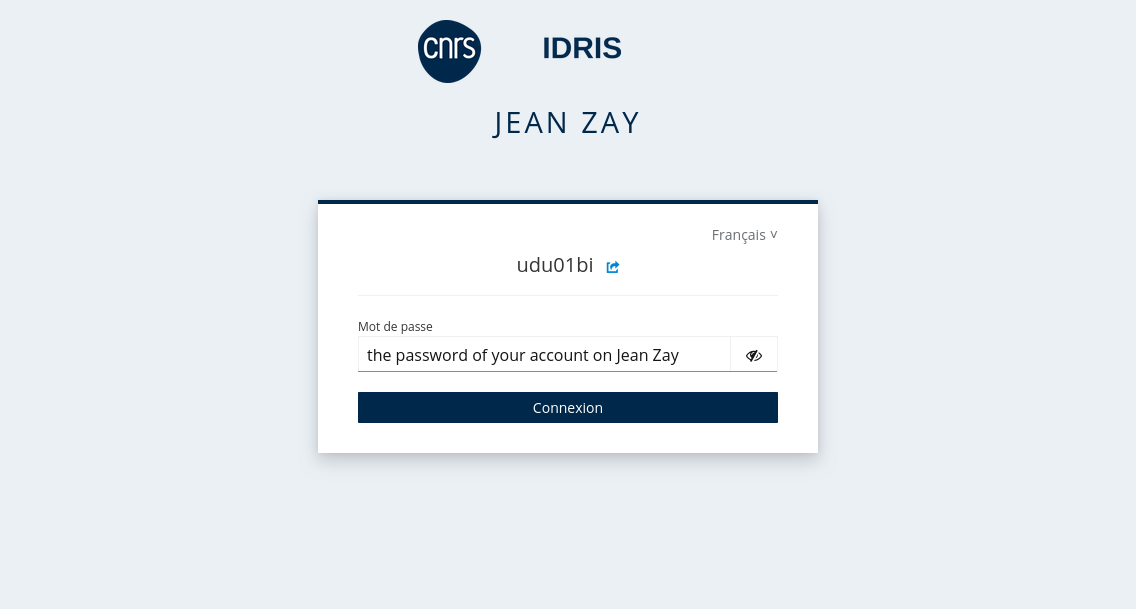
You must then click on "Sign in with Jean Zay SSO" and enter your username:
then your password:
Access via an Intermediate Machine
Start a Dynamic Port Forwarding
If you usually connect to Jean Zay via an intermediate machine, you can use dynamic port forwarding to access our JupyterHub instance.
Dynamic port forwarding is started via the following command:
ssh -D localhost:9080 -N -f <login_machine_proxy>@<machine_proxy>
The parameters <login_machine_proxy> and <machine_proxy> should be replaced by your username on the intermediate machine and its address. The options -N -f allow you to start port forwarding without starting an interactive session on the intermediate machine.
A static port forwarding will not work for using JupyterHub. For more information on the differences between static and dynamic port forwarding, you can consult the following article (in English): How to set up SSH dynamic port forwarding on Linux.
Configure Your Browser's Proxy Settings
You then need to configure your browser to use the port forwarding you have started. The method may differ slightly depending on the browser, but the principle remains the same. We take the example of the Firefox browser here.
When opening a JupyterLab instance, requests are made to external URLs. The procedure differs depending on whether the intermediate machine allows or does not allow outgoing connections to the internet.
- If the intermediate machine allows outgoing connections to the internet
The simplest way is to configure the proxy settings so that all traffic passes through the intermediate machine.
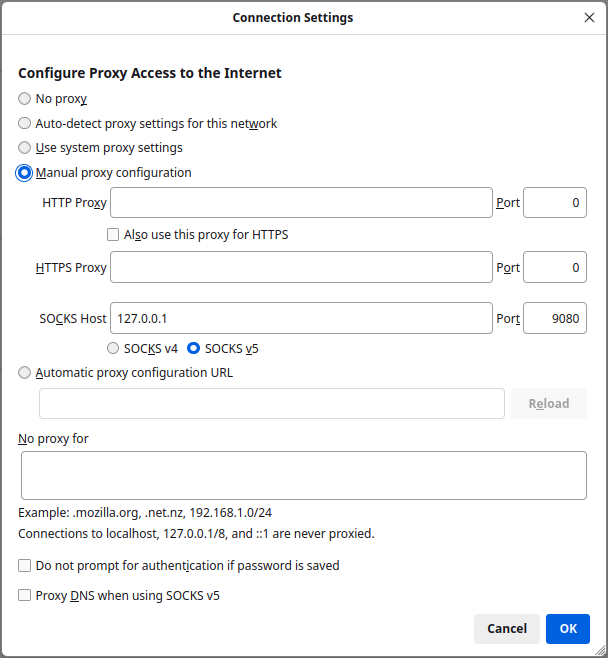
In Firefox, you need to go to Paramètres > Paramètres réseau > Paramètres....
You can then reproduce the configuration visible in the screenshot below, which allows the use of a local SOCKS5 proxy (address 127.0.0.1) on the port 9080 defined when starting the port forwarding:
If you do not wish to generalise the redirection of traffic through the intermediate machine, you can create a profile dedicated to accessing JupyterHub in your browser, use a different browser to access JupyterHub, or use the "FoxyProxy" solution presented below.
- If the intermediate machine does not allow outgoing connections to the internet
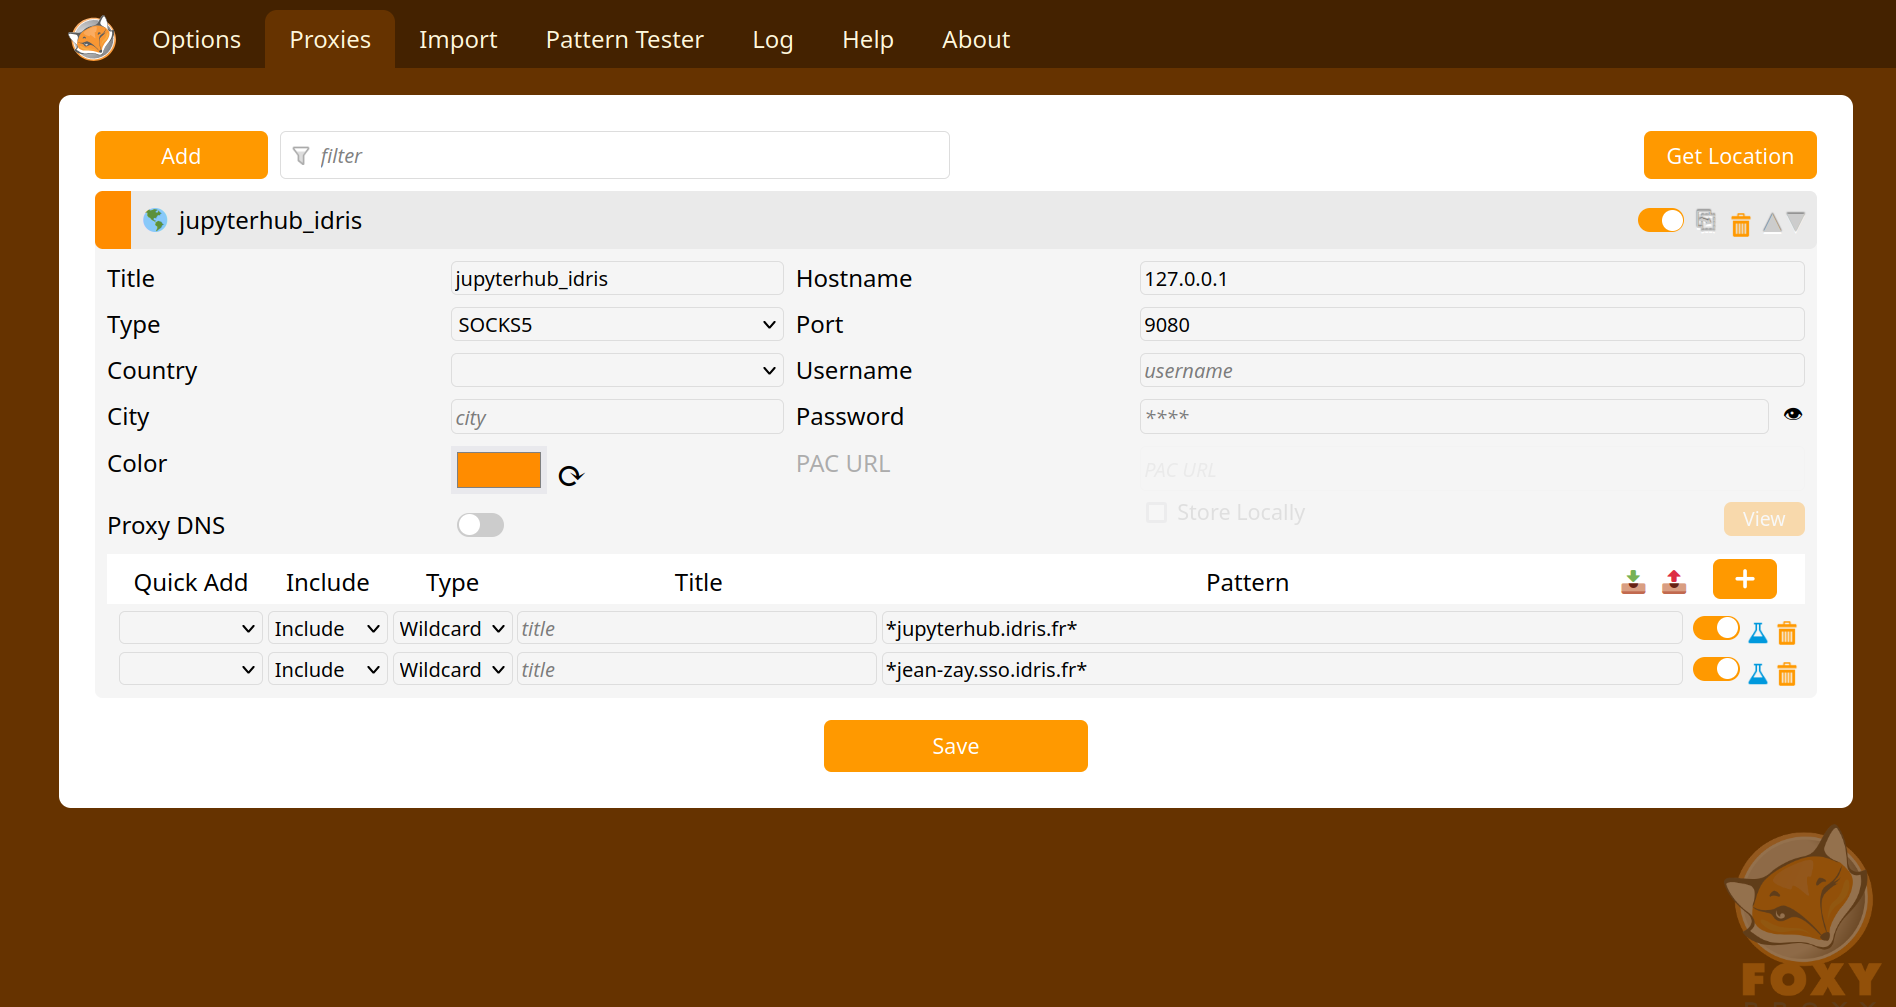
You will need to limit the use of the proxy to access https://jupyterhub.idris.fr and https://jean-zay.sso.idris.fr. The FoxyProxy extension for Firefox, for example, allows you to do this.
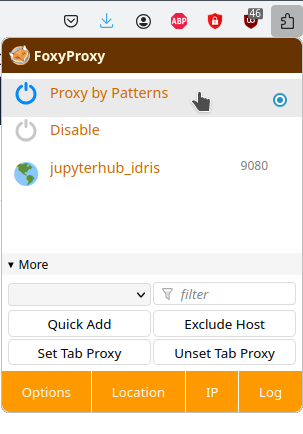
Here is the FoxyProxy configuration that allows the use of a local SOCKS5 proxy (address 127.0.0.1) on the port 9080 defined when starting the port forwarding, only for pages whose address matches the pattern *jupyterhub.idris.fr* or *jean-zay.sso.idris.fr*:
You then need to activate the "Proxy By Patterns" mode by opening the extension settings (by clicking on the puzzle piece at the top right of your browser, then on the FoxyProxy extension):
Once your browser is configured, you can access our JupyterHub instance directly via the address https://jupyterhub.idris.fr.
Access via a VPN
If you use a VPN to connect to Jean Zay but the connection to JupyterHub does not work, contact your IT team to confirm that the VPN is configured so that traffic to https://jupyterhub.idris.fr and https://jean-zay.sso.idris.fr is routed via the VPN.
Create a New JupyterLab Instance
To launch a notebook, you need to create a JupyterLab instance on a node.

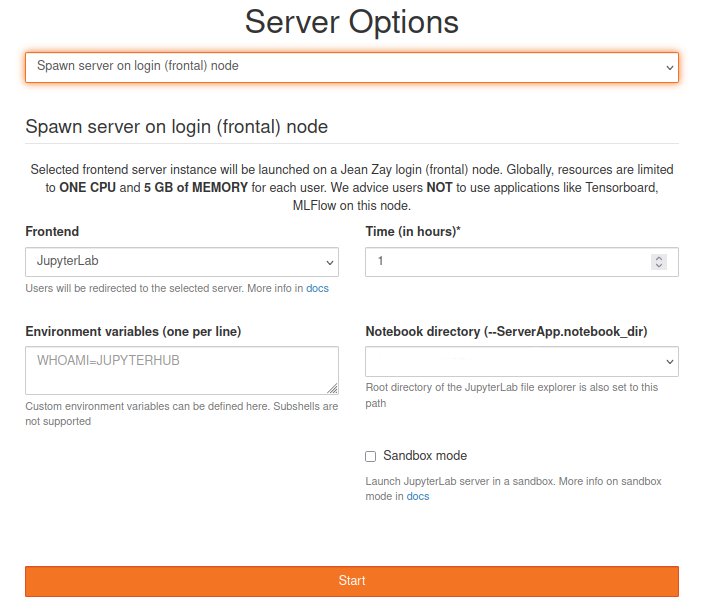
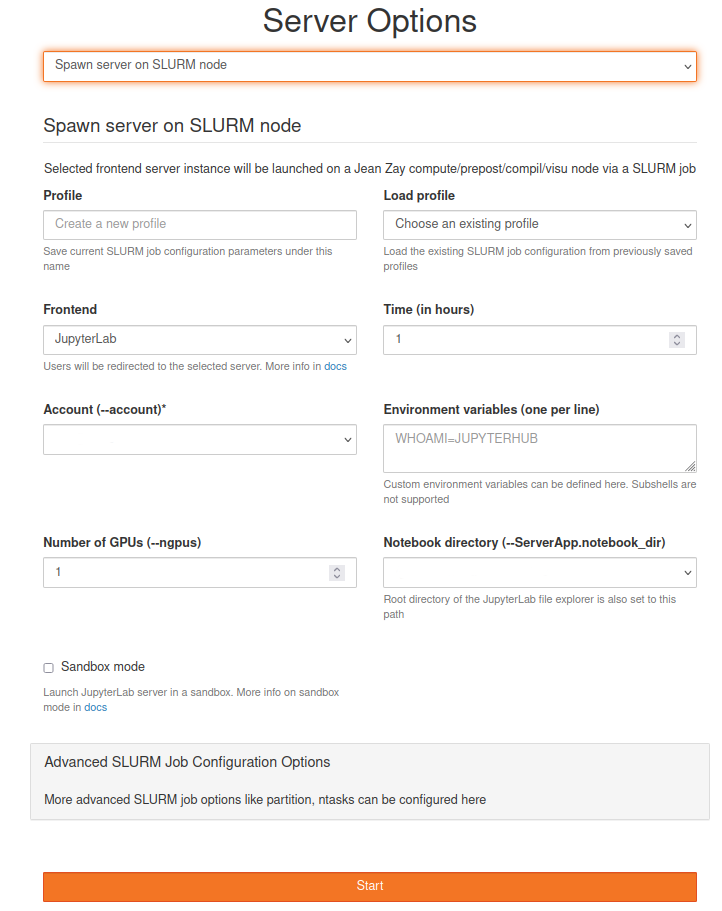
You can then choose to create the instance either on a login node (for example, to have internet access) or on a compute node by reserving resources via Slurm. For each of these two cases, you will need to select the different options (workspace, allocated resources, accounting, etc.).
- Connection from a login node:
- Connection from a compute node:
Choose Your Kernel
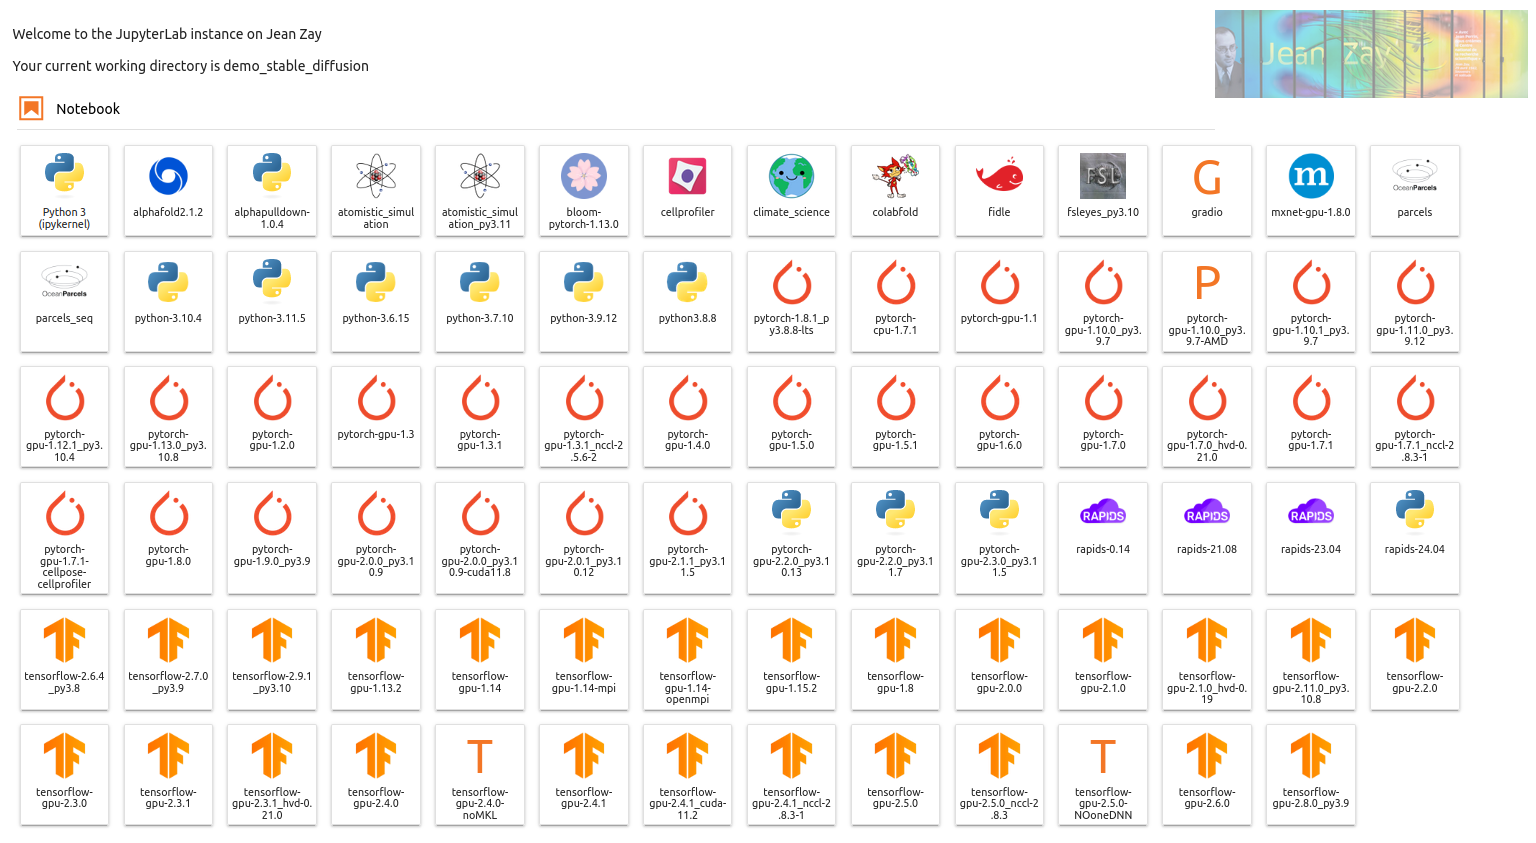
IDRIS provides kernels designed from the modules installed on Jean Zay. You will find all the installed versions of Python, TensorFlow and PyTorch. You can create a new notebook with the desired kernel via the launcher:
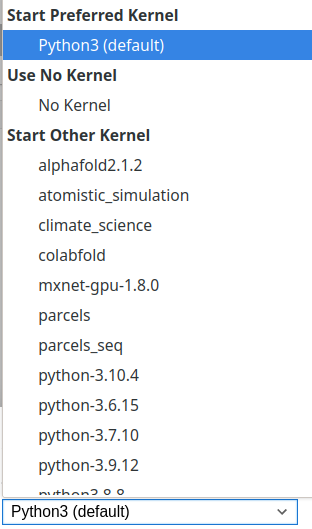
It is also possible to change the kernel on an already created notebook by clicking on the kernel name at the top right of the screen

This will open a dialogue box in which you can select the desired kernel.
Advanced Features
Other more advanced features are available on JupyterHub, such as the use of TensorBoard, MLFlow, creation of custom kernels, etc. These features are described in the JupyterHub Advanced Documentation (in English).