Table des matières
Jean Zay: Access to JupyterHub
The IDRIS teams have installed JupyterHub, a tool enabling the usage of Jupyter Notebooks and other applications like MLflow and Dask via a web interface, without having to initiate an SSH connection to the supercomputer beforehand. A procedure was installed for connecting to this tool and thereby obtain access to the front ends as well as the compute nodes via Slurm.
The presentation of JupyterHub which was given to the user committee on 16/09/2022 is available here (Important: This presentation was developed before the introduction of the SSH-spawner which enables the creation of a JupyterLab instance on a front-end node.)
Accessing JupyterHub
JupyterHub is accessed from the following site: https://jupyterhub.idris.fr. The connection procedures are similar to those for accessing the Jean Zay login nodes:
- Use the same user name and the same password as for accessing the Jean Zay machine.
- IP addresses will still be filtered by the firewall. You can add a new IP address via the FGC form.
- The firewall of your organization should allow HTTPS connections to jupyterhub.idris.fr and jean-zay.sso.idris.fr.
New authentication interface starting from Tuesday, June 4th, 2024
Starting from Tuesday, June 4th, 2024, the connection to our JupyterHub instance will use IDRIS Single Sign-on. The user interface will be different but your login and password are still the same as those for accessing the Jean Zay machine.
When accessing our JupyterHub instance, the following page will be displayed:
You need to click on “Sign in with Jean Zay SSO” and enter your login:
and then your password:
Access via a proxy machine
Start a dynamic port forwarding
If you usually access Jean Zay via a proxy machine, you can use SSH dynamic port forwarding to access our JupyterHub instance.
Use the following command to start the port forwarding:
ssh -D localhost:9080 -N -f proxy_machine_login@proxy_machine
The parameters proxy_machine_login and proxy_machine must be replaced by your login on the proxy machine and its address. The -N -f options allow starting the port forwarding without starting an interactive shell on the proxy machine.
Warning: Static port forwarding will not work to use JupyterHub. For more information regarding the differences between static and dynamic port forwarding, you can read the following document: How to set up SSH dynamic port forwarding on Linux.
Configure the proxy accesses of your browser
It is necessary to configure your browser so that it uses the port forwarding which you started. The way of doing this can differ slightly depending on the browser but the principle is similar. We will use the Firefox browser as example.
When a JupyterLab instance is opened, requests are made to external URLs. The procedure differs according to whether or not the intermediate machine authorizes outgoing connections to the Internet.
- If the intermediate machine authorizes outgoing connections to the Internet
The simplest method is to configure the proxy accesses so that all the transfers pass by the intermediate machine.
On Firefox, you should go into Settings > Network settings > Settings ….
You will then be able to reproduce the configuration visible on the screen snapshot below which permits using a local SOCKS5 proxy (address 127.0.0.1) on the 9080 port defined during the launching of the port forwarding:

Comment: If you do not wish to generalize the forwarding of the transfers through the intermediate machine, you can create a profile in your browser dedicated to JupyterHub access, use a different browser to access JupyterHub or use the “FoxyProxy” solution presented below.
- If the intermediate machine does not authorize outgoing connections to the Internet
You have to limit the usage of the proxy to https://jupyterhub.idris.fr and https://jean-zay.sso.idris.fr accesses only. It is possible to use the Firefox FoxyProxy extension to do this.
Here is the FoxyProxy configuration which allows using a local SOCKS5 proxy (address 127.0.0.1) on the 9080 port defined during the launching of the port forwarding, only for the pages where the address respects the *jupyterhub.idris.fr* or *jean-zay.sso.idris.fr* motif:
Then, you simply need to activate the “Proxy By Patterns” mode by opening the extension parameters (by clicking on the puzzle piece on the top right of your browser and then on the FoxyProxy extension) :
Once your browser is configured, you can directly access our JupyterHub instance via the address https://jupyterhub.idris.fr.
Access via a VPN
If you use a VPN to access Jean Zay but cannot connect to our JupyterHub instance, please contact your local IT team to confirm whether the VPN is configured such that the connection to https://jupyterhub.idris.fr is routed through the VPN.
Creating a new JupyterLab instance
To launch a notebook, it is necessary to create a JupyterLab instance on a node.
You can choose to create the instance in two ways: either on a front-end node (to have Internet access, for example), or on a compute node through reserving resources via Slurm. In each of these two cases, you must select the various options (work space, allocated resources, accounting, etc.).
- Connection from a front-end node:
- Connection from a compute node:
Choosing a kernel
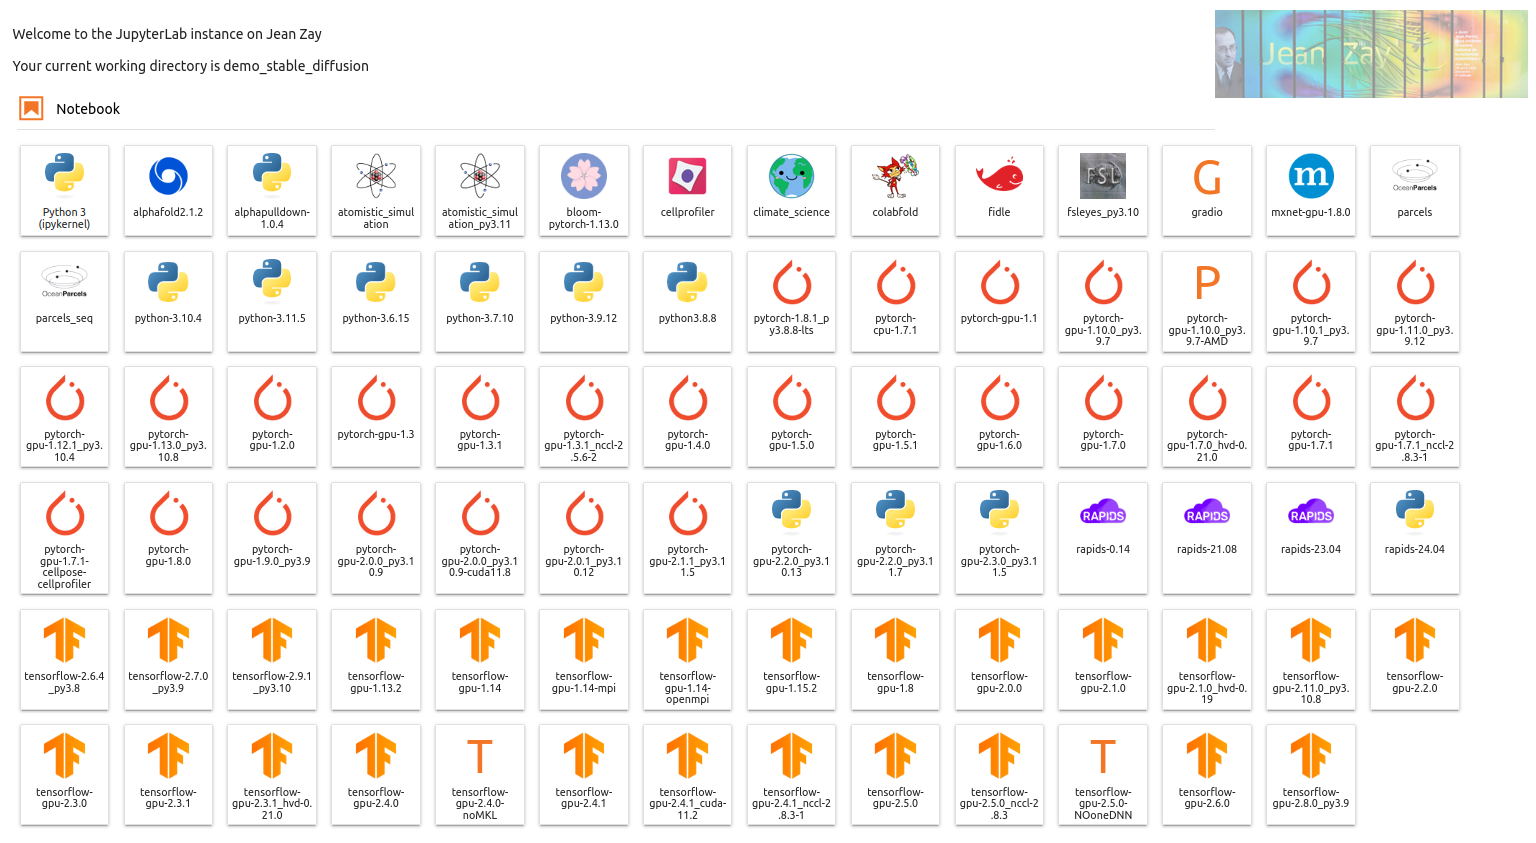
IDRIS provides kernels which are based on modules installed on Jean Zay. You will find here all the Python,Tensorflow and PyTorch versions which are installed. You can create a new notebook with the chosen kernel via the launcher:
It is also possible to change the kernel on a previously created notebook by clicking on the name of the kernel on the top right of the screen.
This will open a dialogue box in which you can select the kernel you wish to have.
Advanced functionalities
Other more advanced functionalities are available on JupyterHub such as the utilization of Tensorboard, MLFlow, creation of personalized kernels, etc. These functionalites are described in the JupyterHub technical documentation: https://idris-cnrs.gitlab.io/jupyter/jupyter-documentation/


