

TINA: Restoration of deleted files
Here is the procedure for restoring one or more deleted files which had been previously saved. The procedure must be executed from the machine where the file(s) were deleted.
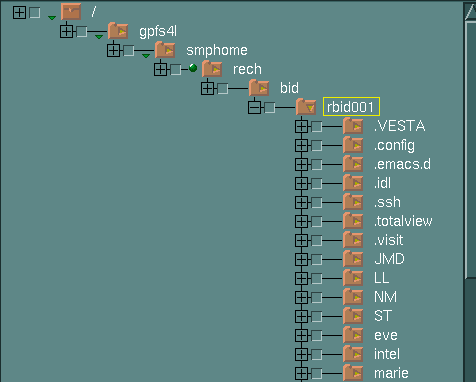
When you click on the cross (+) to the left of your login in the tree hierarchy, you will see the current state of your file tree in your HOME.
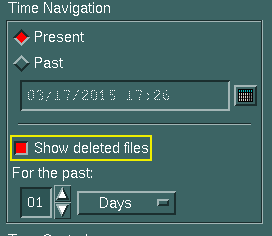
We are going to search for a file by using the Time Navigation.
The Time Navigation area can display all the versions which were saved during a given time period. No matter what the date (present or past), you can view all the directories and files in the tree file which were created or deleted during a specified time period. In this way, it is possible to navigate in the tree file, open directories and obtain information about files which were deleted.
- Look through the file tree and open the directories in which the deleted files were located by clicking on the crosses (+) associated with them. When the directories/files are open, the crosses become lines (-). (Directory
NMin example below)

- Then, in the Time Navigation area, tick the box “Show deleted files”.
- Specify the time period in which the files and directories were deleted. The possible time units are: minutes, hours, days, weeks or months.
The default time period is one day.
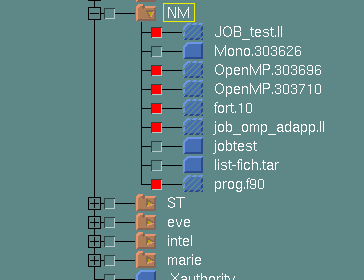
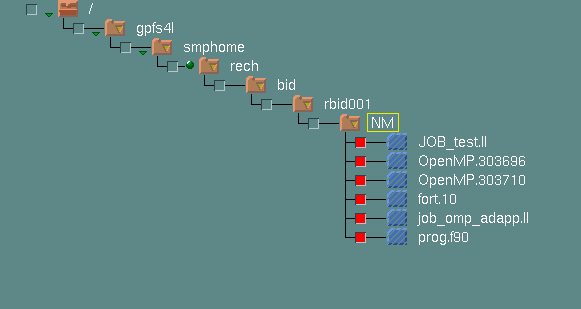
- A new file tree appears which displays all the files and directories which were present on the disk during the specified time period. The files which were deleted during this period are shown with hatched icons.

In this example, the deleted files (JOB_test.ll,OpenMP.303696,OpenMP.303710,fort.10,job_omp_adapp.llandprog.f90) have now been added to the file tree (shown with hatched icons).
- Tick the small boxes associated with the deleted files which you wish to be restored.
Tip :
If you have selected a large number of deleted files to be restored, you can use the menu Restore - View Checked Objects Only to display only the selected files.
- Choose Restore - Run. The Parameters window then appears.
- If necessary, select the options which define your operation:
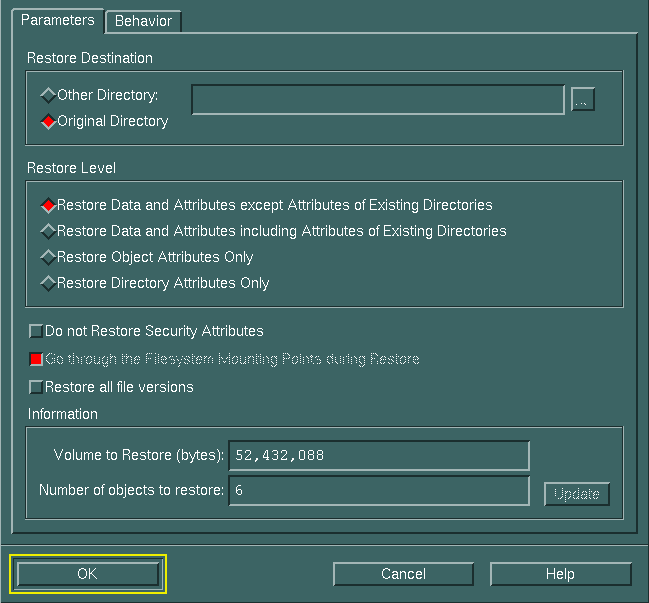


By default, the option Original Directory is chosen. If you do not wish to return the deleted files to their original directories, you must specify a destination directory: To do this, select Other Directory and you can either choose another existing directory by clicking on the small  button to the right, or type in the complete path of the destination directory.
After you have chosen the options, click on OK to validate the operation. The window Restore Information appears and will show the progress of the restoration.
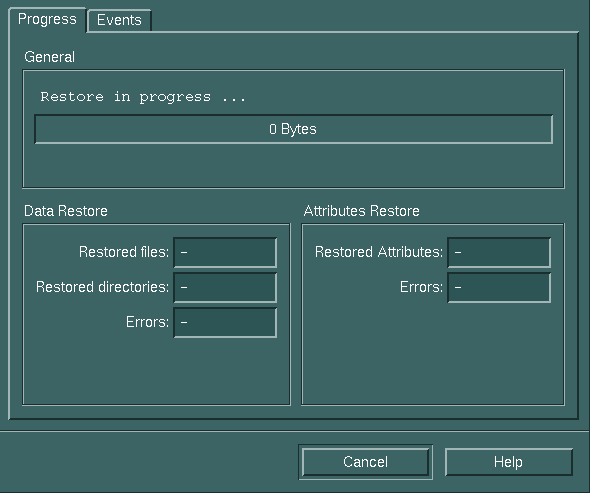
It can take several minutes before the restoration actually begins (loading of cassettes into the robot). If the time delay is very long, consult disponibilité des machines (machine availability) on our WEB site.
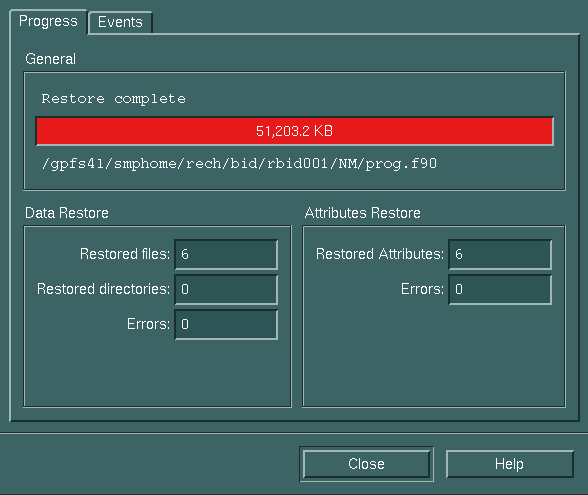
- The message Restore complete will appear when the operation has finished. Confirm this by clicking on OK.
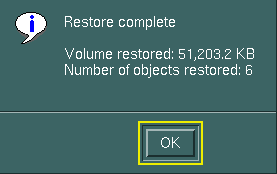
Then close the window Restore Information by clicking on Close. The restoration is now completed.
